HDR – Highly Dubious Rendering?
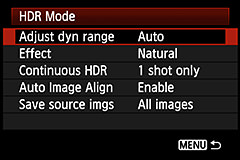
I was muttering darkly about exposure latitude on a trip recently when a kind soul – or, at least, somebody fed up with my muttering – reminded me about the HDR feature on my camera (Canon 5D Mk3, but I’m sure it’s there on most cameras by now). It was a bit of a smack-palm-off-forehead moment; I’d known it was there but had dismissed it a long time ago. However, pick the right tool for the job and all that, so I started taking some sequences of HDR shots.
Which leads nicely on to Lightroom. Something at the back of my head reminded me that one of the new features added in Lightroom 6 was HDR merging. Again, I’d dismissed it because I never used HDR shooting. The question is, why had I dismissed it in the first place?
Try a search online for “HDR Photos“. You’ll get pages of images that look like the unholy offspring of Velvia and Technicolor, and that’s what I’d associated with HDR. Nothing against them, they’re really striking images, it’s just not what I was trying to do at the time. If you look carefully (and quickly, before your eyes start bleeding) you’ll spot some that look a lot more natural. Almost strangely natural. And that got me thinking.
What exactly is HDR? It’s an acronym for “High Dynamic Range”. Dynamic range is the ratio of the brightest bits of a picture that aren’t completely saturated to the darkest bits that aren’t simply noise. The catch is that the Mark 1 human eyeball is way better at capturing dynamic range than even high-end modern cameras, and it’s the reason that you can take a photo of a scene that just looks flat compared to how you remember it.
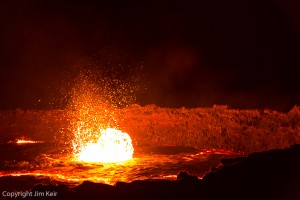
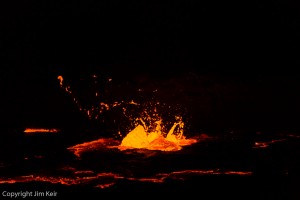
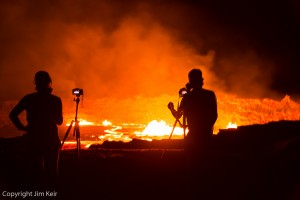
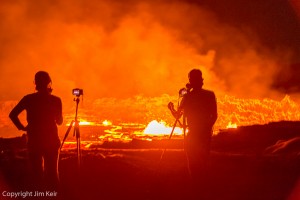
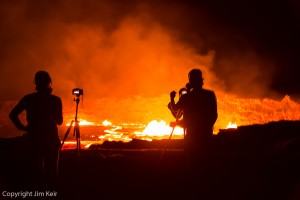
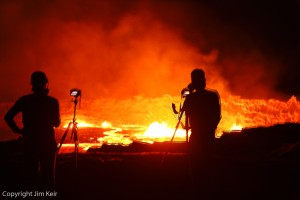
The particular problem I was facing was of trying to photograph lava (which is kind of bright) at night (which is kind of dark). It’s a problem I hope to have many times in the future but sadly it’s also a problem that’s quite expensive to encounter, so anything I can do to get the most out of it would be good. I could see the lava and the surrounding black rocks fairly clearly, but the camera was struggling. Cue HDR and… hey, not bad, even with the camera’s own merging.
So what’s actually happening here? Well, it’s surprisingly simple. The camera is taking a bracketed series of photos. Note that the phrase “HDR” didn’t appear in that last sentence; it’s all down to good old-fashioned bracketing so even if your camera doesn’t have HDR features, you’re still good to go as long as it either a) supports bracketing or b) you can be bothered to set it to manual and take three shots, preferably from a tripod, with different exposure settings. You’ve now got three (or more) photos, each of which has much the same dynamic range as the others, but which are exposed for different ranges. One should be normal, one is horribly underexposed (but has a lot of highlight detail), and one overexposed (but has lots of shadow detail). Oh, if only there were some kind of magic calculating device that could take all of the shadow, mid-range and highlight detail from all three photos and merge them together as one glorious whole!
So, back at home I tried doing the HDR thing in Lightroom. Surely if the camera can merge RAW files acceptably then Lightroom should be able to do it stunningly?
I’m going to skip the slightly breathless descriptions of the correct order in which to push the buttons in Lightroom that you’ll find copy-n-pasted from Adobe’s press release into most of the other “Lightroom HDR” articles online. Contrary to expectations, discovering the Ctrl+H shortcut won’t automatically make you a wildly successful commercial photographer if you’re not one already. The so-brief-it’s-practically-a-thong version is:
- Select some bracketed photos
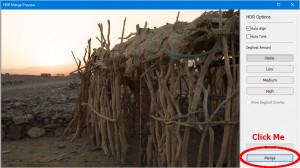
- Press Ctrl+H or use the “Photo Merge->HDR…” menu option
- Click Merge and wait for the results.
Now, depending on whether or not you ticked the “Tone Mapping” button your results will probably be classed as either “Meh” or “Yikes”. You’ll have noticed that “Oh-my-God-the-saturation-has-boiled-my-corneas” isn’t on the list.
Meh
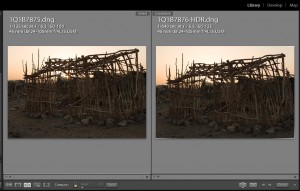
This is the “no tone mapping” option. Pop quiz – see how many comments you can find on other HDR articles along the lines of “nothing I couldn’t have done with a single correctly-exposed RAW image”. This is both correct and incorrect, for different interpretations of “correct”.
Nothing’s gone wrong, you do indeed have a high dynamic range photo. It looks much like the regular non-HDR version because your monitor has even less dynamic range than your camera. All the lovely extra colour information is there, but you just can’t see it yet.
You don’t believe me. I can tell.
OK, try this. Select your HDR copy and go into the Develop module. Drag the “exposure” slider to the right as far as it will go. You’re probably looking at a white screen but that’s OK – the point is how high you can take the slider which, for the particular photo I’m looking at, is +10. That’s ten stops overexposed that Lightroom is allowing you to go, and it’s the same for underexposed. Now try it with the non-HDR, normally-exposed photo – I get +/- 5 stops. In other words, Lightroom knows that the HDR photo has way more dynamic range.
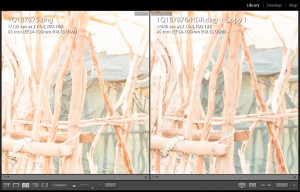
Let’s compare apples with apples and set both photos to +5 stops overexposure. And the result is… ah. They look much the same. Maybe the oh-the-futility crowd are right? Or maybe they just gave up too easily. Go back into the Library module and select a side-by-side view of these two massively overexposed photos. The standard photo will have very little detail and possibly be quite grainy, but the HDR version is way cleaner and shows more details. Exposure and saturation is about equal between the two, and that’s the key to understanding HDR.
Simply put, HDR is to non-HDR what RAW is to JPEG. Kind of, anyway; bear with me a minute. Display a RAW photo next to a JPEG version on screen one after the other and you’ll be hard-pressed to see any difference (yes, yes, compression artifacts, but I’m talking about colour and brightness). Take that JPEG and try to do anything more than minimal tweaks in Lightroom’s Develop module and you’ll soon see the difference – lines, bands, noise and all because JPEG only gives you 256 different colour values per red/green/blue channel. If you raise the exposure so that you’re only looking at the bottom 10% of the potential values, you’ve only got 25 different colours between full dark and full bright, which is why you get that nasty banding.
RAW improves on JPEG by giving you way more values per colour, depending on your camera typically 16,384 instead of 256. The dynamic range is the same – the brightest colour in a JPEG is the same as the brightest colour in a RAW from the same camera and ditto for the darkest – but the RAW captures way more subtlety between those two limits and so can be adjusted far more in Lightroom before you start to see banding. This subtlety is what’s known as “bit depth” and is nothing whatsoever to do with dynamic range. Bit depth says how many different values the sensor can measure between fully-bright and fully-dark; dynamic range says what fully-bright and fully-dark mean.
So HDR doesn’t increase the subtlety any, because RAW is already as good as your camera can record. Instead of packing more values into the same fully-black to fully-white range, HDR extends the range itself so that it can store values blacker than black and whiter than white. That might sound as though it’s only useful to companies that make washing powder, but ‘taint true.
Whiter than white and blacker than black? Nonsense, surely? Of course not; imagine you’re standing in a windowless but lit room wearing a watch with luminous hands, and you can see clearly. All good so far. Now the lights go out and you can see nothing at all, only black. Stick on some night-vision goggles and you’ll be able to see again, thanks to the tiny amount of light coming from your watch, and the luminous hands show up as pure white. Now some joker starts up an arc-welder. Once you stop screaming with pain at the intensity of the light, take the goggles off and look at the arc. Pure white. Now put on a welder’s mask and you’ll see full detail in the arc where previously all you could see was white, but total blackness everywhere else. (Incidentally, this is a thought experiment. Don’t do it. You’ll hurt yourself.)
So, given that “blacker than black” and “whiter than white” do exist if you throw enough technology at them, we come neatly to…
Yikes
… or, as Lightroom calls it, “Tone Mapping”.
If you followed the discussion under “Meh” you’ll now have an HDR photo which, although it looks almost identical to the correctly-exposed non-HDR photo, gives you phenomenal latitude to play with the shadows and highlights.
One option would be to simply use the Exposure slider to move up and down the exposure range, without really changing anything at all. However, given that you had to take underexposed and overexposed photos to get your HDR version in the first place, this doesn’t really gain you anything.
The next option, and much closer to what I had in mind, would be to use the Highlights/Shadows/Blacks/Whites sliders to gently ease just enough of the the whiter-than-white or blacker-than-black areas back into the darker-than-white and brighter-than-black range, simulating what your eyeball told you was there when you took the photo. Full detail in the would-be-bright-under-sunlight lava and detail in the black-rocks-at-night darkness? Yep, we can do that.
In these happy times, of course, another option is to jack everything up to 11 and see what happens. And what happens is pretty much what you find on Google, searching for “HDR Photos”. This is “Tone Mapping”; it basically takes the entire extended range and shoe-horns it back into the normal visual range, leaving you with something that a) looks unrealistic, and b) has a huge amount of information still available if subtlety’s not your thing and you want to take the saturation and contrast sliders to the limits too.
Lightroom’s take on Tone Mapping is basically the “Auto” button in the Develop module’s “Tone” panel. It tries to maximise detail in both shadows and highlights separately, without swamping the mid-range. With an HDR photo, of course, there’s masses of detail on the shadows and highlights and the result is a bit… well, odd. It’s not wacky enough to be full-on “I-licked-the-party-toad” HDR, but also not realistic enough to be a genuine photo. As with so many things, pushing the “Auto” button is a quick shortcut to getting something decidedly average.
And the results?
Those black-rocks-plus-bright-lava-at-night photos? Ah, Yes. Or, more accurately, no.
Having a high dynamic range is great, but reflect for a moment on how we got it. Three separate photos, merged together using the miracle of modern technology. Still three separate photos though, albeit taken one after another on a fast-ish camera. And there’s the problem.
Lava moves. Quite fast, sometimes. Steam moves. People move, also quite fast if there’s moving lava in the vicinity. The camera also moves if it’s not on a very sturdy tripod, and even then it can jitter a little. All of which means that the overlay isn’t going to be perfect.
To be fair, Lightroom does a fairly good job of aligning the separate photos, but it can’t compensate for things moving between shots. There is a setting for “Deghost”, which tries to work out which bits of the photo content have moved and then prefers one source photo over the others, but it’s not perfect and of course also means that you lose the HDR benefits for that area. Try it, select “Medium” deghosting and select the “Show Deghost Overlay” option to see which areas are affected. Once the merge is done, zoom into those areas and you’ll find that they look really noisy compared to non-deghosted areas.
There’s also bits of the final image where it looks as though it’s blown out, even though none of the source images were blown out at that point. I can’t really explain that one, particularly since the in-camera HDR result was fine. In fact the camera, bless it’s little lithium-ion socks, has several different presets for HDR all of which seem to be more appealing than Lightroom’s default “Meh” or “Yikes” modes. That is, of course, missing the relatively massive point that Lightroom then gives you the entire Develop module to play with but in the instant-gratification stakes, it’s Canon 1 – Adobe 0.
A Right Tool
So, at the end of the day, is HDR useful? Kinda. As I said, it’s a case of picking the right tool for the job. if you’ve got a fairly normal lighting range already, HDR is probably overkill unless you really want to produce something hallucinogenic. Moving subject? Forget it. Handheld camera with a static subject? Well, you’ll probably get away with it thanks to the auto-align option. General means of capturing difficult lighting? Mebbe. Depends.
Another tricky situation on the same trip was trying to photograph black people against white salt-flats under searing sunlight. Aha! Yes! HDR to the rescue!!! Right? Wrong. Moving subjects ruin HDR, so the correct answer there was simply to use a flash to light the subjects, and get the camera to overexpose the background.
If it sounds as though I hate using HDR, I don’t. I just don’t see it as the second coming of <insert name of Messiah of choice> for dealing with difficult lighting either. What do I lose if I try it? Well, there’s a second or so while I push the buttons to switch it on, and then there’s four photos to store instead of one so there’s a storage cost. That’s negligible with modern CF card sizes though. And if the HDR result really is useless, there’s always the original, unaltered three bracketed shots to fall back on as long as you got the camera to store them too.
There’s a nice explanation of the Canon 5DMk3 HDR features at http://www.canon-asia.com/snapshot/eos-5dmk3-hdr-170/ .
